Welcome to this comprehensive guide on Grohe kitchen faucet repair. Learn how to troubleshoot and fix common issues, extending the life of your faucet with DIY solutions. Understand the design and mechanics behind Grohe faucets, enabling you to address problems confidently and efficiently. Regular maintenance and timely repairs can prevent costly replacements, ensuring optimal performance and longevity.
1.1 Importance of Regular Maintenance

Regular maintenance is crucial for ensuring the longevity and optimal performance of your Grohe kitchen faucet. By addressing minor issues early, you can prevent leaks, reduce wear and tear, and avoid costly repairs. Simple tasks like cleaning and lubricating faucet parts can significantly extend their lifespan. Additionally, maintaining your faucet helps preserve water efficiency and ensures consistent functionality. Neglecting maintenance can lead to mineral buildup, corrosion, or faulty seals, which may require professional intervention. Stay proactive to keep your Grohe faucet in pristine condition and enjoy uninterrupted service for years to come.
1.2 Overview of Common Issues
Grohe kitchen faucets, while durable, can experience common issues like leaks, drips, and low water pressure. Leaks often stem from worn-out O-rings or seals, while mineral buildup can clog aerators and restrict flow. Faulty cartridges or handles may cause temperature control problems. Identifying these issues early is key to preventing further damage. Regular inspection and maintenance can help mitigate these problems, ensuring your faucet operates smoothly. Understanding these common issues empowers you to address them effectively, saving time and money on professional repairs. Stay ahead of potential problems with proactive care and timely fixes.
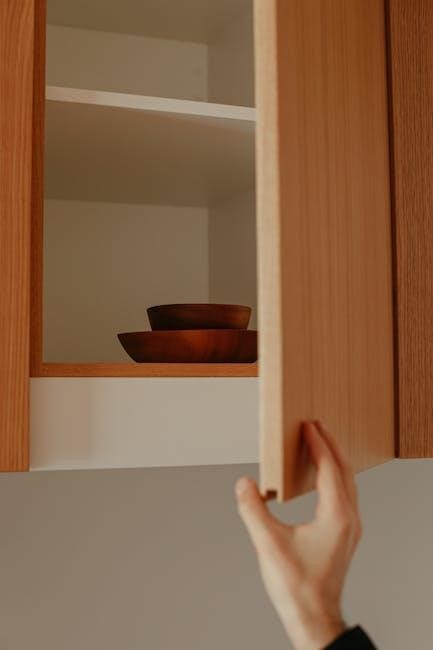
Understanding Grohe Kitchen Faucet Design
Grohe faucets blend modern aesthetics with functional engineering, featuring ergonomic handles, advanced flow control, and durable internal components. Their design emphasizes ease of use and long-term reliability, making them a popular choice for kitchens worldwide. Understanding the design helps in identifying parts and mechanisms, crucial for effective repair and maintenance. This section delves into the key elements that define Grohe’s innovative approach to faucet design, ensuring optimal performance and user satisfaction.
2.1 Key Components of Grohe Faucets
Grohe faucets are built with high-quality components designed for durability and performance. Key parts include the faucet cartridge, spout, handle, and valve. The cartridge regulates water flow and temperature, while the spout directs water flow. Handles provide easy control, and the valve ensures precise water pressure. Internal mechanisms, such as O-rings and seals, prevent leaks and maintain efficiency. These components work together seamlessly, reflecting Grohe’s commitment to innovative design and reliability. Understanding these parts is essential for effective repair and maintenance, ensuring your faucet functions optimally for years.
2.2 Exploring the Faucet’s Internal Mechanism
Inside a Grohe faucet lies a sophisticated mechanism ensuring smooth operation. The core includes a valve system, which controls water flow and temperature. The cartridge or valve cartridge is central, regulating water pressure and mixing hot and cold water. Connected to this are inlet ports for water supply and an outlet for flow. The handle or lever operates the cartridge via a stem, while O-rings and seals prevent leakage. Additionally, some models feature flow limiters and aerators to optimize water use and reduce splashing. Understanding this internal structure aids in diagnosing issues and performing precise repairs, ensuring long-term functionality and efficiency.

Troubleshooting Common Problems
Identify symptoms like leaks, low pressure, or mineral buildup. Inspect O-rings, cartridges, and aerators for wear. Address issues promptly to prevent further damage and ensure optimal performance.
3.1 Identifying Leaks and Drips
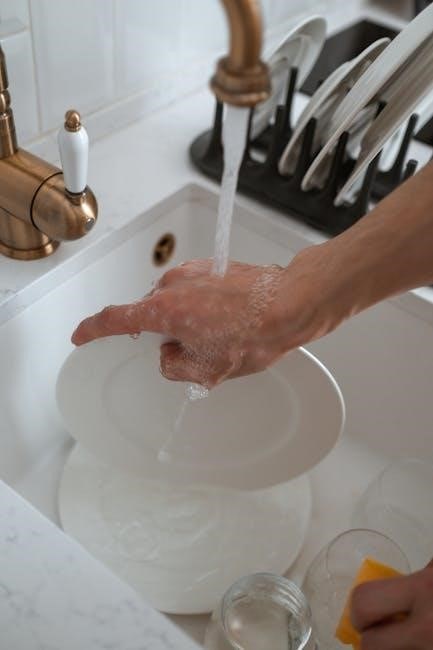
Leak detection is crucial for maintaining your Grohe faucet. Check for water droplets or puddles beneath the faucet or around the base. Inspect O-rings, gaskets, and connections for wear or mineral buildup. Drips often occur due to worn-out seals or loose connections. Use a wrench to stabilize the male coupling while turning the female coupling to avoid spinning both. Replace any damaged parts promptly to prevent water damage and ensure efficient operation. Regular inspection can help identify issues before they escalate.
3.2 Addressing Low Water Pressure
Low water pressure in Grohe kitchen faucets can be caused by mineral buildup, clogged aerators, or faulty cartridges. Start by cleaning or replacing the aerator to remove debris. Check the faucet cartridge for dirt or scale and clean or replace it if necessary. Inspect the water supply lines for kinks or blockages and ensure they are fully open. Descale internal parts using a vinegar solution to remove mineral deposits. If issues persist, consider adjusting the flow restrictor or consulting a professional for further assistance. Regular maintenance can help prevent such problems and maintain optimal water flow.
3.3 Dealing with Mineral Buildup
Mineral buildup, often caused by hard water, can lead to reduced water flow and faulty faucet operation. To address this, soak affected parts like the cartridge, aerator, or spray nozzle in a mixture of white vinegar and water. Gently scrub with a soft brush to remove stubborn deposits. After cleaning, rinse thoroughly and reinstall the components. Regular descaling can prevent mineral accumulation and maintain optimal performance. For severe buildup, consider replacing the affected parts with genuine Grohe replacements to ensure longevity and reliability. This simple maintenance step can significantly extend the life of your faucet.
Essential Tools and Replacement Parts
Gather necessary tools like adjustable wrenches, screwdrivers, and Allen keys. Ensure genuine Grohe replacement parts for reliability. These tools and parts are vital for successful repairs.
4.1 Must-Have Tools for Faucet Repair
When tackling Grohe kitchen faucet repairs, having the right tools is essential. An adjustable wrench is necessary for gripping and turning various faucet components. A flathead screwdriver helps remove handles and access internal parts. Needle-nose pliers are ideal for reaching small spaces and adjusting O-rings or gaskets. Additionally, a set of Allen keys can be useful for certain models. Don’t forget a bucket or container to catch water during disassembly. Ensure all tools are within easy reach to streamline the repair process and minimize downtime. Proper tools prevent damage and ensure a professional finish.
4.2 Identifying Genuine Grohe Replacement Parts
Identifying genuine Grohe replacement parts is crucial for maintaining your faucet’s performance and longevity. Always refer to your repair manual or Grohe’s official website for part numbers and descriptions. Look for the Grohe logo or “GROHE” imprint on packaging and components. Genuine parts, such as cartridges, O-rings, and seals, are designed to meet exact specifications, ensuring proper fit and function. Avoid counterfeit products by purchasing from authorized dealers or Grohe-approved retailers. Double-check product codes and packaging for authenticity before installation. This ensures reliability and preserves your faucet’s warranty. Consulting Grohe’s customer support can also help verify part authenticity if unsure.
Step-by-Step Repair Guides
Master Grohe faucet repairs with detailed guides. From disassembling to replacing parts, these tutorials ensure precise, DIY-friendly solutions, helping you restore functionality efficiently and effectively.
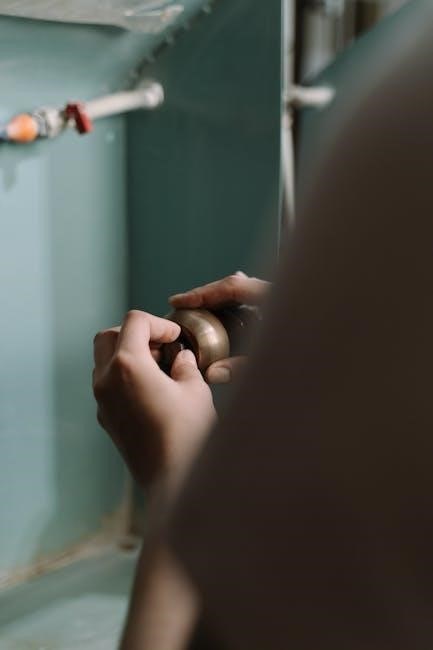
5.1 Disassembling the Faucet
Disassembling your Grohe kitchen faucet is the first step in any repair. Begin by turning off the water supply and disconnecting the water lines. Use an adjustable wrench to stabilize the faucet’s base while unscrewing the retaining ring. Gently lift the spout to access the internal mechanism. Next, remove the handle by taking out the screw or clip holding it in place. This exposes the cartridge or valve system. Be careful to keep all parts organized to ensure proper reassembly later; Proper disassembly ensures safe and effective access to the components needing repair or replacement.
5.2 Replacing the Faucet Cartridge
Replacing the faucet cartridge is a common repair for Grohe kitchen faucets. After disassembling the faucet, locate the cartridge secured by clips or retaining rings. Remove these to access the old cartridge. Gently pull it out, taking note of its orientation. Clean the area thoroughly to ensure proper seating of the new cartridge. Align the notches on the new cartridge with the faucet’s housing and insert it securely. Reattach any clips or rings to hold it in place. Reassemble the faucet in the reverse order of disassembly, ensuring all parts are tightly secured. This step restores proper water flow and eliminates leaks.
5.3 Adjusting the Temperature Limiter
Adjusting the temperature limiter on your Grohe kitchen faucet involves accessing the internal mechanism to modify the maximum water temperature. Start by turning off the water supply and draining the faucet. Remove the handle or knob, often held by a screw or clip, using a screwdriver. Locate the temperature limiter, typically part of the faucet’s cartridge or stem; This limiter restricts the cartridge’s movement, controlling the water temperature. Use an Allen wrench or screwdriver to adjust the limiter by turning it clockwise to lower the maximum temperature or counterclockwise to increase it. Be cautious to avoid removing the limiter entirely, as this could bypass safety features and allow dangerously hot water. After adjusting, reassemble the faucet in reverse order, ensuring all parts are securely tightened. Finally, restore water supply and test the faucet to ensure the temperature adjustment meets your needs. If issues persist, consider replacing the limiter or cartridge with genuine Grohe parts for optimal performance and safety.
Preventative Maintenance Tips
Regular maintenance is key to extending the life of your Grohe kitchen faucet. Clean and lubricate moving parts, inspect seals for wear, and replace them promptly to prevent leaks and ensure smooth operation; Descale the faucet aerator and spray nozzles to remove mineral buildup, which can reduce water flow and pressure. Routinely check the water supply lines for any signs of damage or corrosion and address them before they cause leaks. Additionally, avoid using abrasive cleaners that could damage the faucet’s finish, and always follow the manufacturer’s recommendations for maintenance products. By staying proactive, you can prevent minor issues from becoming major repairs, ensuring your Grohe faucet continues to function efficiently and effectively for years to come.
6.1 Cleaning and Lubricating Faucet Parts
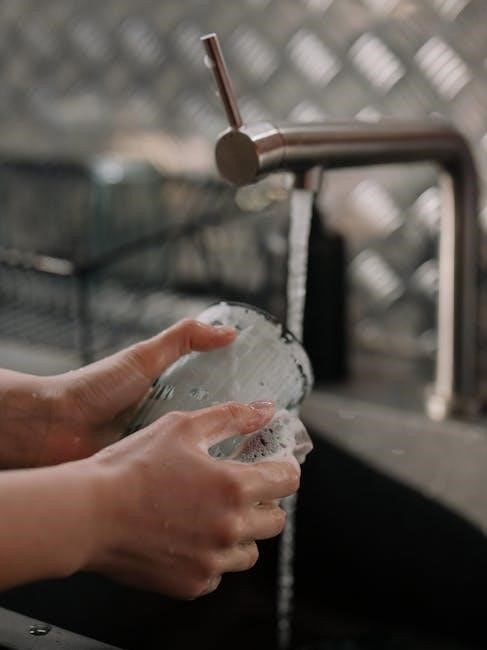
Clean and lubricate your Grohe faucet parts regularly to ensure smooth operation. Use a soft cloth and mild soap to wipe down visible components. For internal parts, soak them in a mixture of vinegar and water to remove mineral buildup. Apply a silicone-based lubricant to moving parts like O-rings and gaskets to prevent friction and leaks. Avoid harsh chemicals or abrasive materials that could damage finishes or seals. Proper cleaning and lubrication not only maintain functionality but also extend the lifespan of your faucet, ensuring optimal performance over time.
6.2 Inspecting Seals and O-Rings
Regularly inspecting the seals and O-rings in your Grohe kitchen faucet is crucial for preventing leaks and ensuring long-term durability. Start by turning off the water supply and disassembling the faucet to access these components. Visually examine the seals and O-rings for signs of wear, cracks, or mineral buildup. Clean them gently with a soft brush or vinegar solution to remove any debris. Replace damaged or worn-out parts with genuine Grohe replacements to maintain optimal performance. Regular inspections can help identify issues early, saving you from costly repairs and ensuring your faucet functions smoothly for years to come.
After completing repairs, thoroughly test your Grohe faucet to ensure proper function and durability. Regular maintenance and inspections will help preserve its longevity.
7.1 Testing the Faucet After Repair
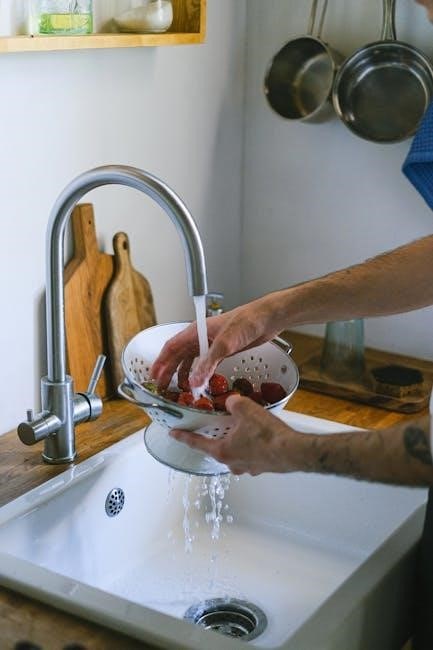
After completing the repair, turn on the water supply and check for leaks around all connections. Ensure both hot and cold water flow smoothly and adjust if necessary. Test the faucet’s handle to confirm it operates effortlessly. Inspect aerators and sprayers for proper water flow. Run water for several minutes to check for drips or irregularities. Verify that the temperature limiter is set correctly for optimal performance. Finally, ensure all parts are securely tightened to prevent future issues. A thorough test ensures your Grohe faucet functions like new.
7.2 Ensuring Long-Term Durability
Regular maintenance is key to ensuring your Grohe faucet lasts for years. After repairs, lubricate moving parts to reduce friction and wear. Inspect and replace worn-out seals and O-rings to prevent leaks. Clean the faucet regularly, especially the aerator, to remove mineral buildup. Use only genuine Grohe replacement parts to maintain performance and durability. Avoid using abrasive cleaners or tools that could damage the finish. Proper usage, such as avoiding extreme water temperatures, also extends lifespan. Schedule periodic professional check-ups to address potential issues early. By following these steps, you can ensure your Grohe faucet remains reliable and functional long-term.
Additional Resources
Consult Grohe’s official repair manuals for detailed guidance. Join online forums and communities for troubleshooting tips and expert advice. These resources help ensure successful faucet repairs and maintenance.
8.1 Grohe Official Repair Manuals
Grohe’s official repair manuals are essential resources for faucet maintenance. These manuals provide detailed step-by-step guides, diagrams, and part lists to help you identify and resolve issues. They cover troubleshooting, disassembly, and replacement of components like cartridges and seals. Accessible online, the manuals are tailored to specific faucet models, ensuring accuracy. They also emphasize the use of genuine Grohe parts for reliability and longevity. By following these manuals, you can perform repairs confidently and effectively. Download the PDF versions from Grohe’s official website for comprehensive guidance on maintaining your kitchen faucet.
8.2 Online Communities and Forums
Online communities and forums are invaluable resources for Grohe kitchen faucet repair. Platforms like Reddit, Home Improvement forums, and specialized plumbing communities offer extensive discussions on troubleshooting and repair techniques. Users share personal experiences, step-by-step solutions, and recommendations for tools and parts. These forums often include advice from DIY enthusiasts and professionals, providing insights into common issues like leaks, low water pressure, and mineral buildup. By engaging with these communities, you can gain practical knowledge and confidence in addressing faucet problems. Searching for specific topics or model numbers can yield targeted advice, making repairs more manageable and effective.